Installing OpenPose on Mac (October 2020 version)
All these poses such beautiful poses. (Rufus Wainwright - Poses)
My future work will soon involve a more gestural analysis of ideophones across languages. I’m slowly plowing through the literature on gesture, but also came across a tweet by Greg Woodin, a PhD student who is investigating gestural metaphors, and who recently installed OpenPose on his computer. OpenPose is a piece of open-source software that represents the first real-time multi-person system to jointly detect human body, hand, facial, and foot keypoints (in total 135 keypoints) on single images.
Let’s first have a look what it can do:
Cool huh!?
Installing OpenPose on Mac
This guide by Maël Fabien was pretty clear in how to install OpenPose, but I had to make a small tweak. That is why I’m basically repeating that guide but with the switch I made, a sort of October 2020 guide. But thanks so much Maël for guiding the way.
Step 1) Clone the repository in the target folder
Open terminal and change directory cd to your target folder
git clone <https://github.com/CMU-Perceptual-Computing-Lab/openpose>
Step 2) Install CMake GUI :
If you don’t have homebrew installed as a package manager on Mac, you should do so asap. Here’s a handy cheatsheet for homebrew.
brew cask install cmake
(or the old fashioned way: follow the steps on https://cmake.org/download/)
Step 3) Install dependencies :
bash 3rdparty/osx/install_deps.sh
Step 4) Generate caffe.pb.h manually using protoc as follows. Install caffe with homebrew
In the directory, you installed Caffe to
~~protoc src/caffe/proto/caffe.proto --cpp_out=. mkdir include/caffe/proto mv src/caffe/proto/caffe.pb.h include/caffe/proto~~See this issue for more details.
Just to be sure, install Caffe with homebrew (all the other steps are unnecessary)
brew install caffeStep 5) CMake
Open CMake GUI.
cd /Applications

open CMake.app
Select the OpenPose directory as project source directory, and a non-existing or empty sub-directory (e.g., build) where the Makefile files (Ubuntu) or Visual Studio solution (Windows) will be generated. If the build does not exist, it will ask you whether to create it. Press Yes.
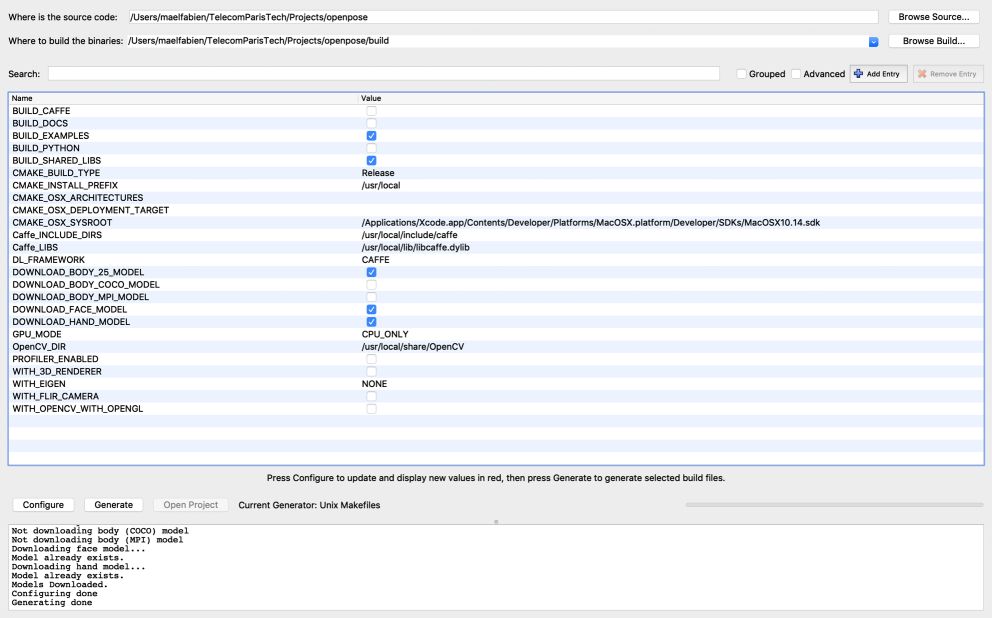
Step 6) Make the following adjustments to the CMake config before pressing “Configure”:
BUILD_CAFFE set to false

GPU_MODE set to CPU_ONLY (as recommended for MacOS)

Caffe_INCLUDE_DIRS set to /usr/local/include/caffe

Caffe_LIBS set to /usr/local/lib/libcaffe.dylib
See this issue for more details.
Step 7) Configure
Press configure, wait until Configuring Done appears.
Everything should work well, and you should be able to click the Generate right after (BUT DON’T CLICK IT?). If ever you get an error here, especially with High Sierra, please check this issue.
Step 8) Build the project :
(within the OPENPOSE folder you made on your computer, navigate there with cd)
cd build/

make -j`nproc`
Running OpenPose
Warning, running OpenPose takes a long time on a normal persoanl computer. But you can check it out on really short video clips and stills.
Step 1: Go to the OPENPOSE folder
cd OPENPOSEFOLDERPATHStep 2: Make an INPUT and OUTPUT folder
Put an image / video … in the input folder
Step 3: run the following:
./build/examples/openpose/openpose.bin --image_dir INPUT/ --write_images OUTPUT/You can also analyze the hands with the flag --hand or face with the flag --face etc. For more fun with flags, see this document.
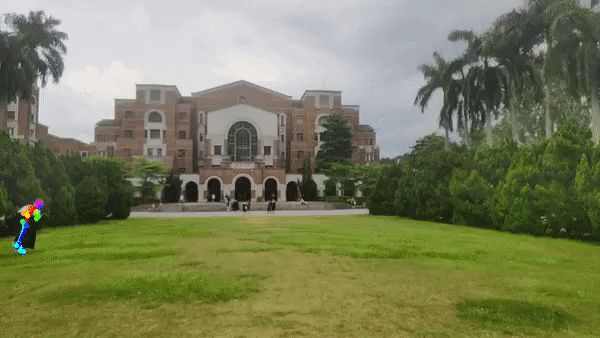
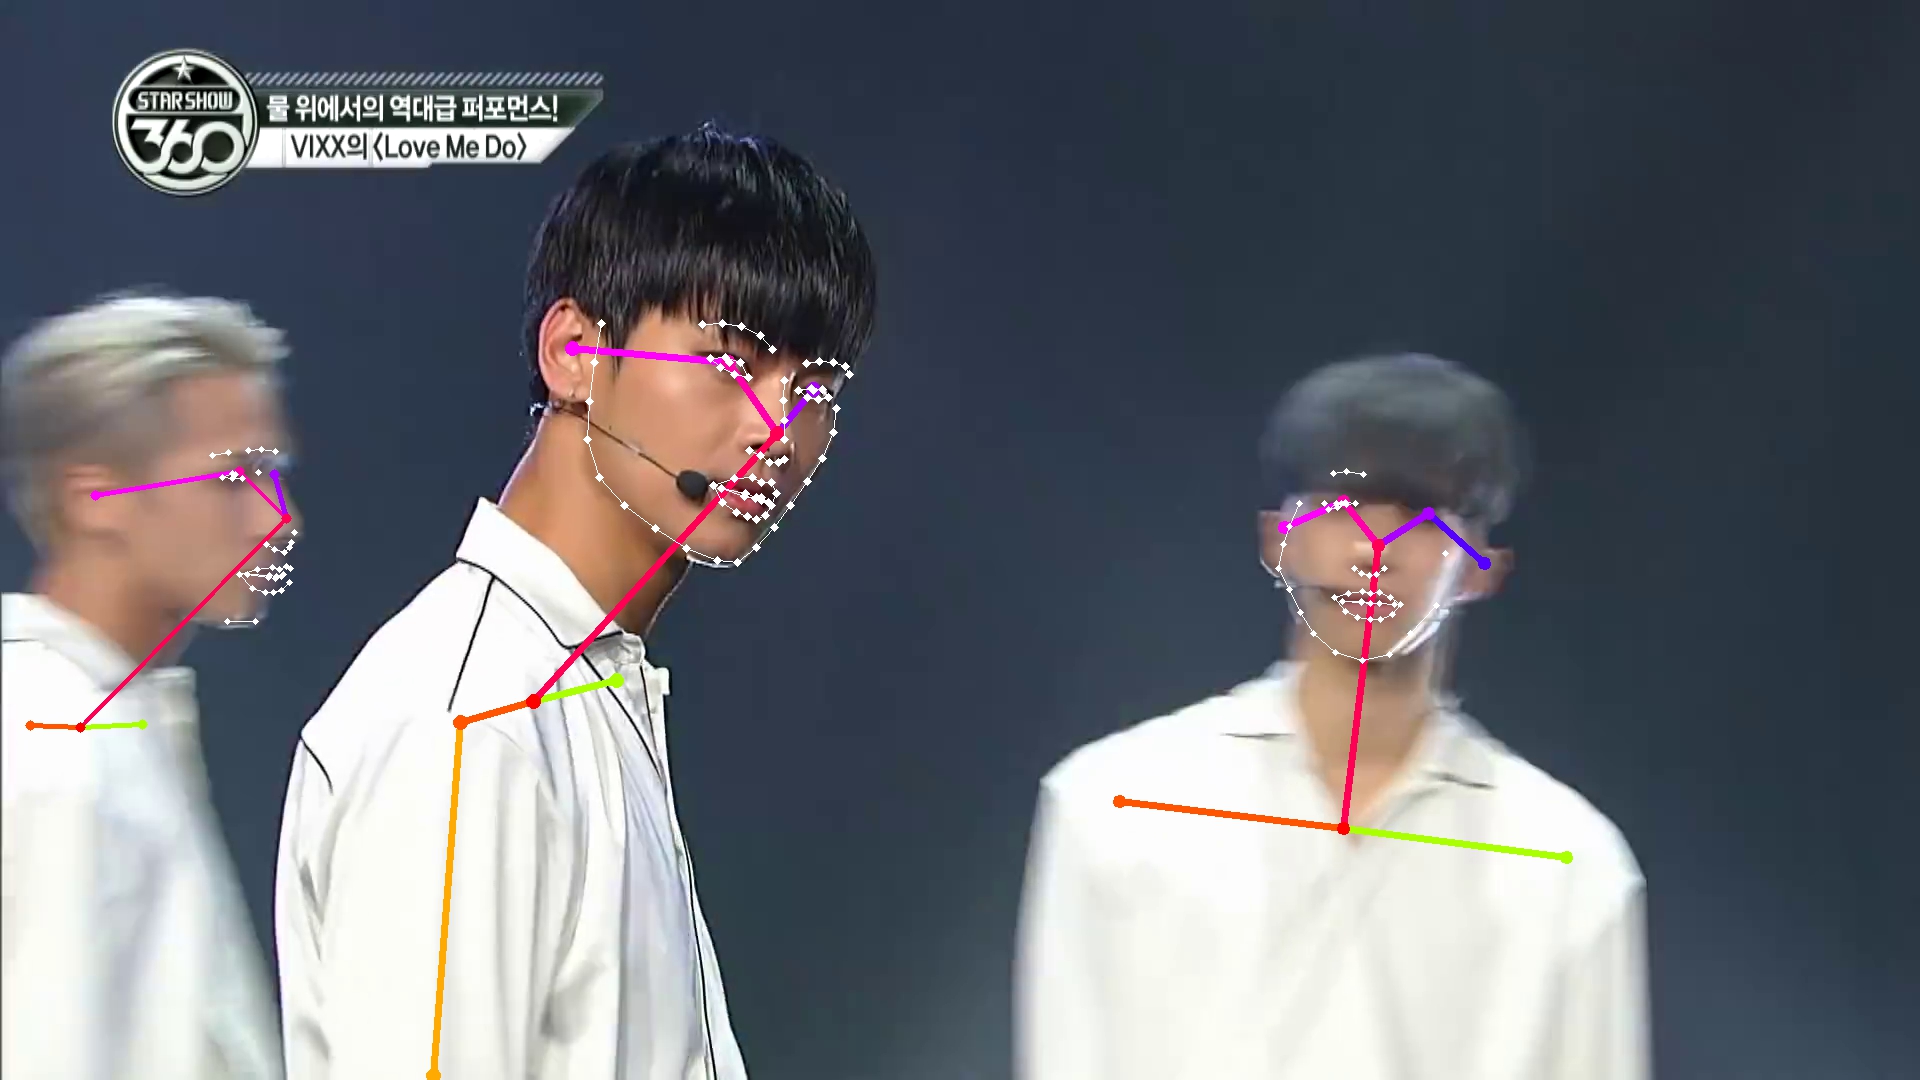
Results
Preliminary results show a fun gif that has been OpenPosed, as well as a still from my favorite K-pop band VIXX (song: Love me do). Have fun with all these poses!